River rock can turn a plain backyard into a low-maintenance, polished landscape that looks like a pro installed it. Unlike mulch that decomposes or grass that demands weekly mowing, these smooth stones stay put, drain well, and give your yard a clean, natural aesthetic. Whether someone’s covering bare patches, directing runoff, or just tired of fighting weeds, river rock offers a practical solution that doesn’t require a landscaping degree. This guide walks through why it works, where to use it, and how to install it without turning the project into a weekend nightmare.
Table of Contents
ToggleKey Takeaways
- Backyard river rock landscaping eliminates mulch decomposition and grass maintenance, delivering a durable, low-maintenance landscape that stays pristine for decades.
- River rock provides superior drainage by allowing water to permeate freely through stone gaps, preventing puddles, erosion, and foundation damage.
- Effective river rock installation requires proper site prep, landscape fabric, appropriate edging, and 1- to 2-inch stones for pathways or 3- to 6-inch cobbles for accents and dry creek beds.
- Dry creek beds serve dual purposes as functional stormwater management and sculptural landscape features that guide runoff naturally.
- Long-term maintenance of river rock landscapes involves seasonal debris removal, occasional weeding, and minor top-offs every 3 to 5 years to maintain original depth and appearance.
Why River Rock Is the Perfect Choice for Backyard Landscaping
River rock brings several advantages that make it a go-to material for homeowners tackling landscape projects. First, it’s durable, these stones have already survived centuries of tumbling in riverbeds, so a few seasons in a backyard won’t faze them. They won’t break down like organic mulches, meaning no annual top-ups or decomposition mess.
Drainage is another major win. River rock allows water to flow through freely, making it ideal for areas prone to puddling or where downspouts discharge. The gaps between stones let rain percolate into the soil instead of pooling on the surface, which helps prevent erosion and foundation issues.
From a maintenance standpoint, river rock is hard to beat. It suppresses weeds (especially when paired with landscape fabric), doesn’t attract pests like wood mulch can, and won’t fade or wash away in heavy rain. A quick rake or leaf blower clears debris, and the stones look as good in year five as they did on install day.
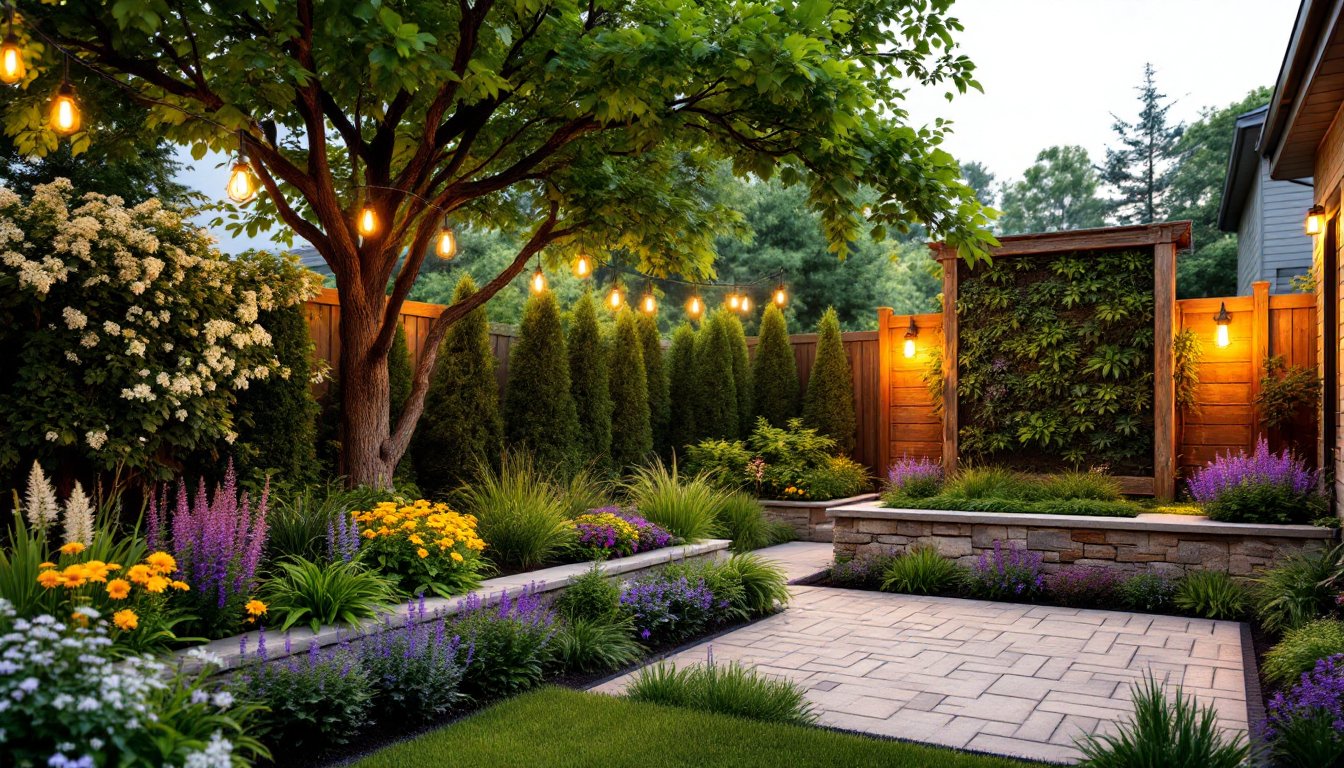
Aesthetically, river rock fits multiple design styles, modern minimalist, rustic cottage, Japanese-inspired gardens, or xeriscaping. Sizes range from pea gravel (roughly ¼-inch diameter) up to 6-inch cobbles, and colors span white, gray, tan, brown, and even reddish hues depending on local geology. That versatility means it pairs well with plantings, pavers, or timber edging without clashing.
Popular River Rock Landscaping Ideas for Your Backyard
River rock isn’t a one-trick pony. Here are some of the most effective ways to put it to work.
River Rock Pathways and Garden Borders
Pathways made from river rock are budget-friendly and surprisingly easy to install. They work best for light foot traffic, think a stroll through a flower bed or a route to the compost bin. For heavier use, consider embedding stepping stones or pavers within the rock to create a more stable walking surface.
Choose 1- to 2-inch river rock for pathways. Anything smaller (like pea gravel) tends to scatter and track indoors: anything larger gets uncomfortable underfoot. Excavate the path to a depth of 3 to 4 inches, lay landscape fabric to block weeds, and fill with rock. Edge the path with metal or plastic edging, brick, or pressure-treated lumber to keep stones from migrating into the lawn.
Garden borders use river rock to define planting beds and create visual separation. A 3- to 4-inch layer around shrubs or perennials keeps mulch in place, deters weeds, and adds texture contrast. Larger cobbles (3 to 6 inches) work well along fence lines or as accents near entryway plantings. For those exploring broader landscaping strategies, beginning landscape projects often start with simple border treatments before tackling more complex features.
Dry Creek Beds and Drainage Solutions
A dry creek bed is one of the best-looking ways to manage stormwater. It mimics a natural streambed, guiding runoff from downspouts, sloped areas, or low spots where water collects. Beyond function, it adds a sculptural element that looks intentional even when dry.
To build one, map the drainage path and dig a shallow channel, typically 6 to 12 inches deep and 2 to 4 feet wide, depending on flow volume. Line the bottom with landscape fabric, then fill with a mix of river rock sizes: larger 4- to 6-inch cobbles along the edges and center to mimic boulders, and smaller 1- to 3-inch stones in between. Integrate native grasses, ferns, or ornamental sedges along the banks to soften the look.
For serious drainage issues, standing water, erosion gullies, or clay soil that doesn’t percolate, a dry creek bed alone might not cut it. In those cases, a professional may need to install a French drain (a perforated pipe buried in gravel) beneath the rock. Check local building codes: some jurisdictions require permits for drainage work that redirects water toward neighboring properties or storm systems. Effective water management in landscaping often combines surface solutions like dry creek beds with subsurface drainage for comprehensive control.
How to Plan and Prepare Your River Rock Landscape Project
Good prep prevents a sloppy result. Start by measuring the area to calculate how much rock is needed. River rock is sold by the ton or cubic yard. A general rule: one ton covers roughly 100 square feet at 2-inch depth. For a 200-square-foot area at 3-inch depth, expect to order about 2 tons. Most suppliers deliver in bulk, which is far cheaper than bagged rock from a big-box store.
Decide on rock size and color based on the application. Pea gravel (¼ to ½ inch) works for tight spaces and mulch replacement. 1- to 2-inch river rock suits pathways and general groundcover. 3- to 6-inch cobbles make bold accents or dry creek edges. Visit a landscape supply yard to see samples in person, photos online rarely show true color or scale.
Next, prep the site. Remove existing grass, weeds, and debris. For areas prone to aggressive weeds (like Bermuda grass or bindweed), consider a non-selective herbicide a week before excavation, following label instructions. Excavate to the planned depth, usually 3 to 4 inches for most applications. If the soil is heavy clay or drains poorly, dig an extra inch and add a base layer of crushed stone or decomposed granite before the landscape fabric. This improves drainage and prevents the river rock from sinking into mud over time.
Landscape fabric is essential. It blocks weeds without stopping water flow. Roll it out over the excavated area, overlapping seams by 6 inches, and secure with landscape staples every 3 feet. Skip the fabric, and weeds will colonize the gaps between stones within a season.
Edging keeps the rock contained. Options include:
- Metal or plastic landscape edging: Flexible, easy to install, nearly invisible once covered.
- Pressure-treated 4×4 or 2×6 lumber: Rustic look, good for straight lines or gentle curves.
- Brick or stone pavers: More labor-intensive, but creates a polished border.
Stake or anchor edging firmly: loose edging will shift and let rock spill out.
Finally, plan for delivery logistics. A ton of rock takes up about 12 to 15 cubic feet and weighs, well, a ton. Make sure the delivery truck can access the yard or be ready to wheelbarrow it from the driveway. That part’s pure grunt work.
Step-by-Step Installation Guide for River Rock Landscaping
Once materials are on-site, installation moves quickly if prep was done right.
Tools and Materials Needed:
- Shovel or flat spade
- Garden rake
- Landscape fabric (commercial-grade woven or spun)
- Landscape staples
- Edging material and stakes
- Wheelbarrow
- Work gloves and knee pads
- River rock (calculated quantity)
- Optional: tamper or plate compactor for firm base
Step-by-Step Process:
-
Excavate the area to 3 to 4 inches deep. Remove roots, rocks, and debris. Rake the bottom smooth and level. If drainage is a concern, slope the base slightly away from structures.
-
Install edging along the perimeter. Drive stakes or anchors per manufacturer instructions. For curves, use flexible metal or plastic edging: for straight runs, lumber works well.
-
Lay landscape fabric over the excavated area, smoothing out wrinkles. Overlap seams by at least 6 inches. Secure with landscape staples every 2 to 3 feet, plus extra staples along edges and seams.
-
Spread the river rock evenly over the fabric. Pour or shovel from the wheelbarrow, working in small sections. Aim for a uniform depth of 2 to 3 inches. Use a garden rake to level and distribute stones, especially in corners and along edges.
-
Check for low spots where fabric might show through. Add more rock as needed. Walk the area gently to settle stones, then rake again for a finished look.
-
Water lightly with a hose to rinse dust off the rock and help it settle. This also reveals any thin spots that need topping off.
For dry creek beds, place larger cobbles (4 to 6 inches) first along the edges and in the center to create a natural streambed look, then fill gaps with smaller river rock. Nestle a few accent boulders into the design for realism. According to Gardenista’s guide to river rocks, mixing stone sizes and placing them deliberately mimics how water would naturally deposit stones over time.
Safety notes: Wear gloves to avoid cuts and blisters. If using a plate compactor, wear ear protection and safety glasses. Lift with your legs, not your back, bags and wheelbarrows of rock are heavier than they look.
Maintaining Your River Rock Landscape for Long-Lasting Appeal
River rock demands less maintenance than most landscaping materials, but it’s not zero-maintenance.
Weed control is the main task. Even with landscape fabric, windblown seeds and organic debris can create a thin layer of soil on top of the rock where weeds sprout. Pull weeds by hand when they’re small, or spot-treat with a targeted herbicide. A flame weeder (propane torch wand) works well for killing weeds between stones without chemicals, just mind nearby plants and dry conditions.
Raking and debris removal keeps the rock looking fresh. Use a flexible leaf rake or leaf blower to clear fallen leaves, pine needles, and twigs. In fall, this might be a weekly chore: the rest of the year, monthly is usually enough. For stubborn debris caught between stones, a shop vac works surprisingly well.
Over time, rock can settle or shift, especially in high-traffic areas or after heavy rains. Top off thin spots with additional rock as needed. Most projects need a small refresh every 3 to 5 years, maybe a quarter-ton to restore the original depth.
Edging inspection should happen annually. Frost heave, foot traffic, and lawn mower impacts can loosen stakes or warp edging. Re-stake or replace damaged sections before rock starts escaping into the lawn. For those working on driveway landscaping projects, the same edging maintenance applies where rock meets asphalt or concrete.
Algae or moss can develop on river rock in shaded, damp areas. It’s mostly cosmetic but can make stones slippery. Scrub with a stiff brush and water, or use a diluted outdoor cleaner safe for stone. Improving sunlight exposure or drainage often prevents recurrence.
Color fading isn’t an issue with natural stone, but dust and dirt can dull the finish. A rinse with the garden hose once or twice a year brings back the clean, polished look. For design inspiration and maintenance strategies, resources like Sunset and The Spruce offer regional tips and seasonal upkeep schedules tailored to different climates.
With minimal effort, a well-installed river rock landscape will look sharp for decades. The work is in the setup: after that, it mostly takes care of itself.